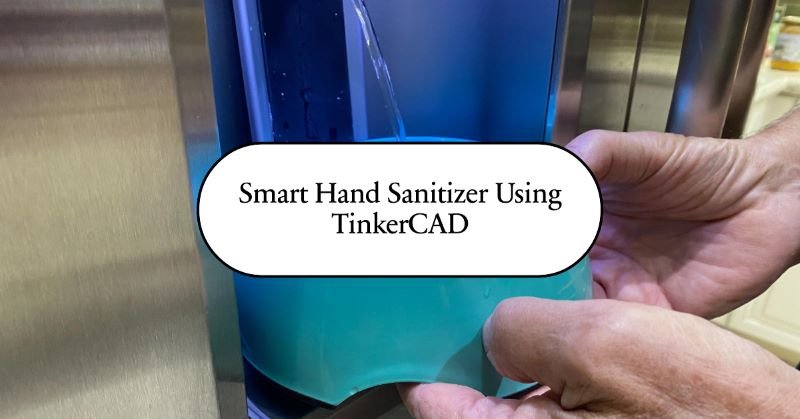
Smart Hand Sanitizer Using TinkerCAD
In recent times, the importance of regular hand sanitization has been emphasized as a primary preventive measure against the spread of diseases. One innovative approach to ensure effective hand hygiene without the need for physical contact is the development of a smart hand sanitizer. This project will guide you through designing a smart hand sanitizer using TinkerCAD, an easy-to-use online 3D design and electronics simulation platform.
Hardware Components
1. Arduino Uno
The Arduino Uno is an open-source microcontroller board that serves as the brain of the project. It interfaces with various input and output components, making it an ideal choice for building interactive projects. The board can be programmed to respond to inputs and control outputs according to user-defined requirements.
2. Ultrasonic Sensor
An ultrasonic sensor is used to measure the distance of an object by emitting ultrasonic waves from a transmitter. When these waves hit an object, they are reflected back to a receiver, which converts the reflected signal into an electrical signal. In this project, the ultrasonic sensor detects the presence of a hand near the nozzle of the sanitizer dispenser.
3. Servo Motor
A servo motor is a rotary actuator that provides precise control of angular position, velocity, and acceleration. It operates on the principle of Pulse Width Modulation (PWM). In this project, the servo motor controls the flow of sanitizer through the nozzle by rotating its shaft when a hand is detected.
4. Jumper Wires
Jumper wires are used to connect different components on a breadboard. They have pins and connectors that make it easy to establish connections between the Arduino board, ultrasonic sensor, and servo motor.
Circuit Connections
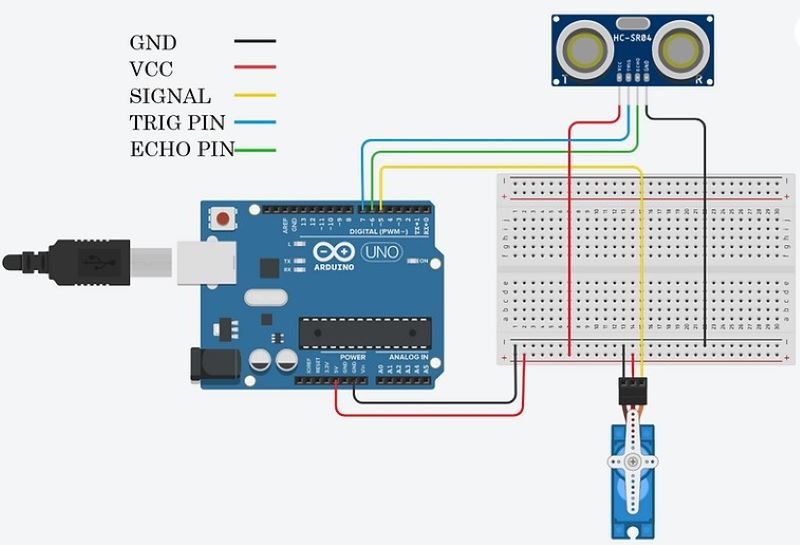
The following connections need to be made in TinkerCAD to set up the smart hand sanitizer:
- Connect Vcc of the ultrasonic sensor to the 5V pin of the Arduino via a breadboard.
- Connect the ground (GND) of the ultrasonic sensor to the ground pin of the Arduino via a breadboard.
- Connect the trigger pin of the ultrasonic sensor to the D7 pin of the Arduino.
- Connect the echo pin of the ultrasonic sensor to the D6 pin of the Arduino.
- Connect the ground (GND) of the servo motor to the ground rail on the breadboard.
- Connect the signal pin of the servo motor to the D5 pin of the Arduino.
Code
Below is the Arduino code to control the smart hand sanitizer:
#include <Servo.h>

const int trigPin = 7;
const int echoPin = 6;
const int servoPin = 5;
Servo myservo;

void setup() {
Serial.begin(9600);
pinMode(trigPin, OUTPUT);
pinMode(echoPin, INPUT);
myservo.attach(servoPin);
myservo.write(0); // Initial position
}

void loop() {
long duration;
int distance;

// Clear the trigPin
digitalWrite(trigPin, LOW);
delayMicroseconds(2);

// Set the trigPin high for 10 microseconds
digitalWrite(trigPin, HIGH);
delayMicroseconds(10);
digitalWrite(trigPin, LOW);

// Read the echoPin
duration = pulseIn(echoPin, HIGH);

// Calculate the distance
distance = duration * 0.034 / 2;

// Print the distance to the serial monitor
Serial.print("Distance: ");
Serial.print(distance);
Serial.println(" cm");

// Control the servo motor based on distance
if (distance < 10) {
myservo.write(90); // Dispense sanitizer
} else {
myservo.write(0); // Default position
}

delay(1000);
}
Working Principle
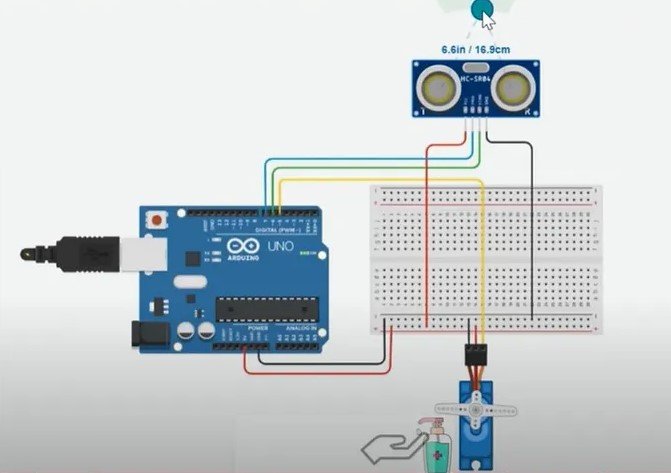
The project operates by detecting the presence of a hand near the sanitizer nozzle using an ultrasonic sensor. The ultrasonic sensor continuously measures the distance of any object in front of it. When a hand is detected within a 10 cm range, the servo motor is activated to rotate its shaft, thereby dispensing sanitizer. If no hand is detected within this range, the servo motor remains in its neutral position.
Conclusion
In conclusion, Building a smart hand sanitizer using TinkerCAD and Arduino is an excellent project for those interested in embedded systems and electronics. This project not only helps in reducing physical contact with surfaces, thereby minimizing the risk of contamination, but also provides a hands-on experience in working with sensors, actuators, and microcontrollers. By following the steps outlined above, you can create an efficient and effective smart hand sanitizer to promote better hygiene practices.