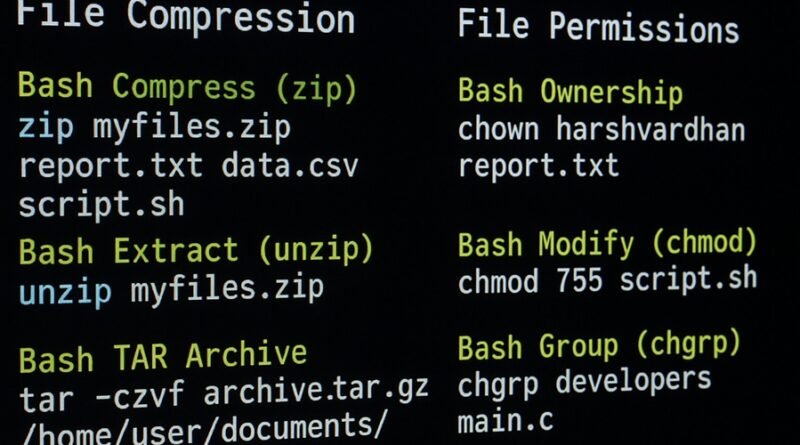
File Compression and File Permissions in Bash: A Complete Guide for Beginners
Introduction
When working with Linux or any Unix-based system, Bash (Bourne Again Shell) is your ultimate command-line companion. Whether you are managing files, automating backups, or securing system access, understanding file compression and file permissions is essential.
This article dives deep into two critical aspects of Bash:
- File Compression – efficiently storing and transferring data.
- File Permissions – controlling who can access or modify your files.
Let’s explore each section with practical commands and real-world use cases.
Explore:
File Compression in Bash
File compression helps save disk space and makes it easier to share or back up files. Bash offers several tools to compress and extract files — the most common being zip, unzip, and tar.
1. Bash Compress (zip)
The zip command compresses files or directories into a single .zip archive.
Syntax:
zip [options] archive_name.zip file1 file2 ...
Example:
zip myfiles.zip report.txt data.csv script.sh
This command creates a compressed archive named myfiles.zip containing the three files.
To compress an entire directory:
zip -r project.zip /home/user/project
-rmeans recursive, so all files and subdirectories inside/projectare included.
Useful Options:
-r– Recursively include subdirectories.-q– Quiet mode (no output).-9– Maximum compression.-e– Encrypt archive with a password.
Example with encryption:
zip -e backup.zip confidential.txt
2. Bash Extract (unzip)
The unzip command extracts the contents of a .zip file.
Syntax:
unzip [options] archive_name.zip
Example:
unzip myfiles.zip
This extracts all files in the current directory.
Extract to a specific directory:
unzip myfiles.zip -d /home/user/extracted/
List contents without extracting:
unzip -l myfiles.zip
Useful Options:
-d– Specify extraction directory.-l– List contents.-q– Quiet mode.
3. Bash TAR Archive
The tar command (short for Tape Archive) is one of the most powerful tools in Linux for file archiving and compression.
It supports multiple compression formats like .tar, .tar.gz, .tar.bz2, and .tar.xz.
Syntax:
tar [options] archive_name.tar file1 file2 ...
Create an uncompressed archive:
tar -cvf archive.tar file1.txt file2.txt
-c→ Create archive-v→ Verbose output-f→ Filename of archive
Extract a TAR archive:
tar -xvf archive.tar
-x→ Extract files
Create a compressed GZIP archive:
tar -czvf archive.tar.gz /home/user/documents/
Extract a .tar.gz file:
tar -xzvf archive.tar.gz
Create a BZIP2 compressed archive:
tar -cjvf archive.tar.bz2 /var/log/
Extract a .tar.bz2 file:
tar -xjvf archive.tar.bz2
List contents without extracting:
tar -tvf archive.tar.gz
Summary Table:
| Task | Command Example |
|---|---|
| Create TAR | tar -cvf archive.tar file1 file2 |
| Extract TAR | tar -xvf archive.tar |
| Create TAR.GZ | tar -czvf archive.tar.gz dir/ |
| Extract TAR.GZ | tar -xzvf archive.tar.gz |
| List TAR Contents | tar -tvf archive.tar |
File Permissions in Bash
File permissions in Linux determine who can read, write, or execute a file. Every file and directory has associated permissions and ownership.
Let’s break it down.
1. Understanding Permission Structure
Run the ls -l command to view permissions:
ls -l
Output:
-rwxr-xr-- 1 user group 2048 Oct 25 10:00 script.sh
Explanation:
-rwxr-xr--r→ readw→ writex→ execute
- Three sets of permissions:
- Owner (user):
rwx - Group:
r-x - Others:
r--
- Owner (user):
2. Bash Modify (chmod)
The chmod command changes file permissions.
Syntax:
chmod [options] mode file_name
Symbolic method:
chmod u+x script.sh
Adds execute (x) permission for the user (owner).
Numeric method:
Each permission has a numeric value:
- Read = 4
- Write = 2
- Execute = 1
Add them for combined permissions:
rwx= 7rw-= 6r--= 4
Example:
chmod 755 script.sh
- User: 7 (rwx)
- Group: 5 (r-x)
- Others: 5 (r-x)
Remove write permission for others:
chmod o-w data.txt
Recursive permission change:
chmod -R 755 /home/user/project/
3. Bash Ownership (chown)
The chown command changes the ownership of a file or directory.
Syntax:
chown [options] new_owner file_name
Example:
chown harshvardhan report.txt
Changes the file owner to harshvardhan.
Change both owner and group:
chown harshvardhan:developers project/
Recursive ownership change:
chown -R harshvardhan:admin /var/www/
4. Bash Group (chgrp)
The chgrp command changes the group ownership of a file.
Syntax:
chgrp [options] group_name file_name
Example:
chgrp developers main.c
Recursive group change:
chgrp -R admins /opt/server/
Common Ownership & Permission Tasks
| Task | Command |
|---|---|
| Change file permissions | chmod 644 file.txt |
| Make script executable | chmod +x script.sh |
| Change file owner | chown user file.txt |
| Change file group | chgrp team file.txt |
| Change both owner & group | chown user:group file.txt |
Best Practices
- Always verify ownership before modifying permissions on system files.
- Use least privilege principle — grant only necessary permissions.
- For shared directories, set group ownership properly using
chownorchgrp. - Use
chmod -Rcarefully — it can expose or break critical system files if applied incorrectly. - Combine compression (
tar,zip) and permission commands for backup automation.
Conclusion
Mastering file compression and file permissions in Bash empowers you to manage files efficiently and securely. Whether you are automating backups with tar or setting proper access with chmod and chown, these commands are foundational for every Linux user, developer, or system administrator.
By practicing these Bash commands, you’ll gain the confidence to control your system resources like a true Linux professional.
