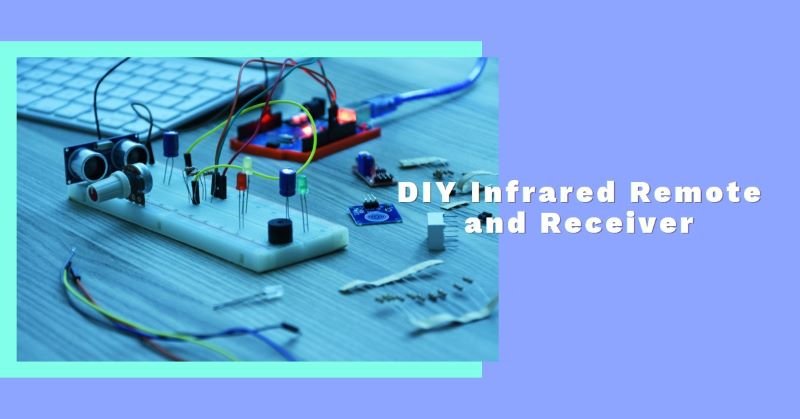
DIY Infrared Remote and Receiver with Arduino and ESP 32: Complete Tutorial
Infrared (IR) communication is a ubiquitous technology that has become an integral part of our daily lives. From remote controls for TVs, air conditioners, and home entertainment systems to wireless data transfer between devices, IR technology plays a crucial role. In this comprehensive guide, we will explore how to use Arduino and ESP32 boards to design and build your own IR remotes and receivers.
Understanding Infrared Communication
Before delving into the practical aspects of building IR remotes and receivers, it’s essential to understand the fundamentals of infrared communication.
Infrared Radiation
Infrared radiation is a form of electromagnetic radiation with a wavelength longer than visible light, ranging from approximately 700 nanometers (nm) to 1 millimeter (mm). This radiation is invisible to the human eye but can be detected by specialized sensors.
IR Communication Principles
IR communication relies on the modulation of infrared light to transmit data between devices. The transmitter encodes the data into a series of pulses of infrared light, which are then detected and decoded by the receiver.
Components Required
To build IR remotes and receivers using Arduino and ESP32, you’ll need the following components:
- Arduino or ESP32 board
- IR LED (for transmitter)
- IR receiver module (for receiver)
- Breadboard and jumper wires
- Resistors (for current limiting)
Setting up the Arduino/ESP32 Environment
Before you can start programming your Arduino or ESP32 board, you need to set up the development environment. Follow these steps:
- Download and install the Arduino IDE (Integrated Development Environment) from the official website: Arduino IDE.
- For ESP32 boards, you’ll need to add the ESP32 board support to the Arduino IDE. Follow the instructions provided in the official ESP32 documentation: ESP32 Setup Guide.
Building an IR Transmitter
Creating an IR transmitter involves generating and modulating infrared signals to transmit data wirelessly. Here’s how you can build an IR transmitter using an Arduino or ESP32 board:
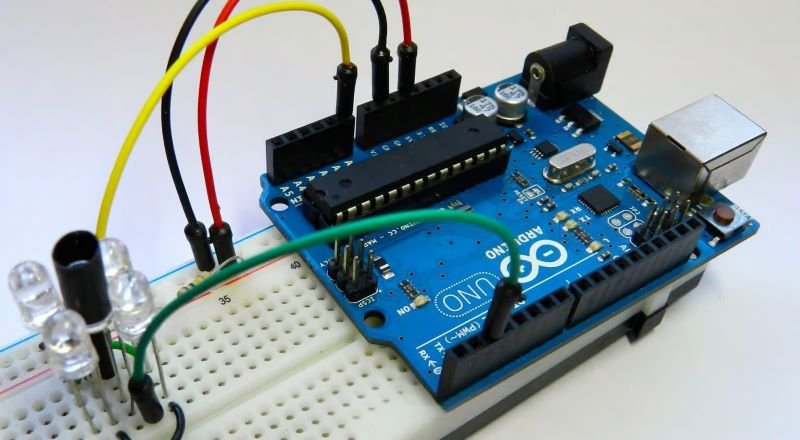
Hardware Setup
- Connect the IR LED to a digital pin on your Arduino or ESP32 board through a current-limiting resistor (typically around 150-220 ohms).
- Connect the cathode (negative) side of the IR LED to ground (GND).
Software Implementation
- Include the necessary libraries for IR communication in your Arduino or ESP32 sketch.
- Define the IR protocol and codes you want to transmit.
- Set up the IR transmitter by configuring the digital pin connected to the IR LED.
- Implement the code to generate and modulate the IR signals according to the desired protocol and codes.
- Transmit the IR signals by pulsing the IR LED with the modulated signal.
Here’s an example code snippet for transmitting an NEC protocol IR signal using the IRremote library on an Arduino:
#include <IRremote.h>
IRsend irsend;
#define IR_LED_PIN 3
#define IR_PROTOCOL NEC
void setup() {
irsend.begin(IR_LED_PIN, IR_PROTOCOL);
}
void loop() {
unsigned long code = 0x12345678; // Replace with your desired code
irsend.sendNEC(code, 32); // Send the NEC code (32 bits)
delay(5000); // Wait for 5 seconds before transmitting again
}
Building an IR Receiver
An IR receiver is designed to detect and decode infrared signals transmitted by an IR remote or transmitter. Here’s how you can build an IR receiver using an Arduino or ESP32 board:
Hardware Setup
- Connect the IR receiver module to your Arduino or ESP32 board.
- The receiver module typically has three pins: ground (GND), power (VCC), and data output (OUT).
- Connect the GND pin to the ground rail on your breadboard.
- Connect the VCC pin to the appropriate power supply (e.g., 3.3V or 5V, depending on the module’s specifications).
- Connect the OUT pin to a digital pin on your Arduino or ESP32 board.
Software Implementation
- Include the necessary libraries for IR communication in your Arduino or ESP32 sketch.
- Set up the IR receiver by configuring the digital pin connected to the receiver module’s OUT pin.
- Implement the code to continuously read and decode the incoming IR signals.
- Process the decoded data according to your application’s requirements.
Here’s an example code snippet for receiving and decoding an NEC protocol IR signal using the IRremote library on an Arduino:
#include <IRremote.h>
IRrecv irrecv(IR_RECEIVER_PIN);
decode_results results;
void setup() {
Serial.begin(9600);
irrecv.enableIRIn(); // Start the receiver
}
void loop() {
if (irrecv.decode(&results)) {
if (results.value == 0x12345678) { // Replace with your desired code
Serial.println("NEC code received");
}
irrecv.resume(); // Receive the next value
}
}
Advanced Topics
IR Protocols
There are various IR protocols used for remote control and data transfer applications. Some popular protocols include NEC, Sony, RC5, and Philips RC6. Each protocol has its own encoding scheme, timing, and data format. When building IR remotes and receivers, it’s crucial to ensure that you use the correct protocol for your application.
IR Code Libraries
Several open-source libraries are available for Arduino and ESP32 to simplify the implementation of IR communication. Some popular libraries include:
- IRremote (Arduino)
- IRremoteESP8266 (ESP8266/ESP32)
- IRLib2 (Arduino)
These libraries provide functions and examples for transmitting and receiving IR signals using different protocols.
IR Code Capture and Analysis
To create custom IR remotes or integrate with existing devices, you may need to capture and analyze the IR codes transmitted by those devices. There are various tools and techniques available for this purpose, such as using an IR receiver module connected to a logic analyzer or a dedicated IR code capture tool like IRemote for Windows or IrScrutinizer for macOS.
IR Signal Modulation and Demodulation
IR communication involves modulating and demodulating the infrared signals to encode and decode data. Different modulation techniques, such as pulse width modulation (PWM) or pulse distance modulation (PDM), can be used depending on the IR protocol and application requirements.
Conclusion
In conclusion, Infrared communication is a versatile and widely used technology that can be easily implemented using Arduino and ESP32 boards. By understanding the principles of IR communication and following the steps outlined in this guide, you can design and build your own IR remotes and receivers for various applications. Whether you’re creating a custom remote control or experimenting with wireless data transfer, Arduino and ESP32 provide a powerful platform for your IR projects.